
Design to cost locks a target price into the design brief from day one, so engineers make trade-offs against a budget instead of discovering the real cost after tooling is cut. Most of a product's lifecycle cost gets fixed during design, not manufacturing, which is why the discipline pays off most when applied early. Product managers, design engineers, and cost engineers all use it to hit margin targets without the late-stage scramble that usually follows a costly design.
TL;DR:
- Early cost data and parametric models are essential for accurate cost estimation during concept development and before detailed design begins.
- Cross-functional teams with clear ownership and authority are critical to prevent cost targets from being overlooked or ignored later in development.
- Implementing cost considerations throughout all design phases, especially during teardown and prototyping, helps catch costly decisions before tooling commitments are made.
- Stale or outdated cost data can mislead teams and cause cost overruns, making regular updates and supplier validation crucial.
- A phased, incremental approach over 30 to 180 days effectively ingrains design-to-cost practices into product development workflows.
Table of Contents
- What is design to cost, and how does it differ from related methods?
- What are the core principles of a design-to-cost approach?
- How do you implement design-to-cost across the product lifecycle?
- What tools and data support accurate early cost estimates?
- What does design-to-cost look like inside an NPD centre?
- What are the common pitfalls of design-to-cost, and how do you avoid them?
- What's a realistic 30/90/180-day plan to start using design-to-cost?
- The leadership shift design-to-cost actually requires
- How Emuski helps teams put design-to-cost into practice
- Sources
- FAQ
What is design to cost, and how does it differ from related methods?
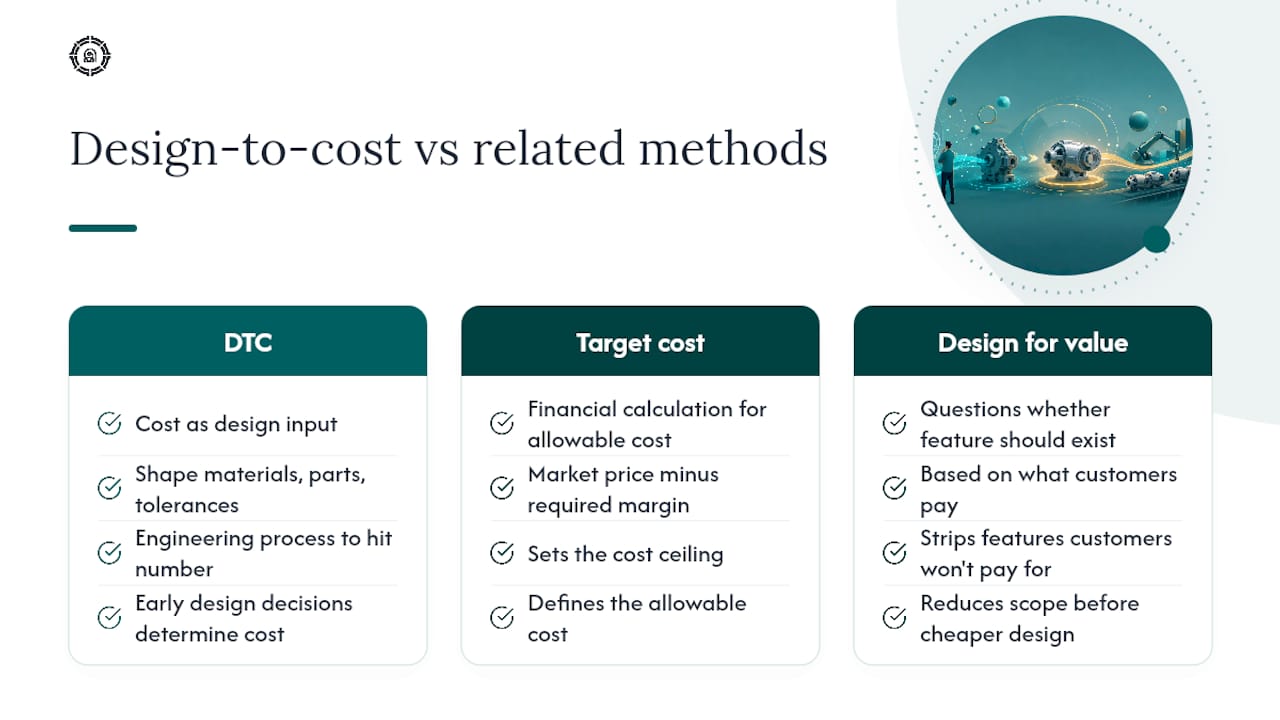
Design to cost (DTC) treats cost as a design input on the same footing as function, weight, or reliability. Instead of designing a product and then costing it, engineers work backwards from an allowable cost and shape material choices, part counts, and tolerances to stay inside it. A washing machine team given a £180 target manufacturing cost, for example, will choose a stamped steel drum bracket over a cast one not because it's better, but because it's the option that fits the number.
DTC gets confused with two related ideas. Target costing is the financial calculation behind it, working out the allowable cost from the market price minus the required margin, and DTC is the engineering process that hits that number. Design for value goes further, questioning whether a feature should exist at all based on what customers actually pay for it, whereas DTC generally assumes the feature stays and asks how to build it more cheaply. Value engineering and target costing complement DTC: target costing sets the ceiling, value engineering strips out what customers won't pay for, and DTC does the day-to-day design work inside those boundaries.
The reason this matters so much is timing. Academic reviews of design-for-cost methods consistently find that early design decisions, material selection, geometry, and process choice, determine the bulk of what a product will eventually cost to build, long before a single tool is machined.
What are the core principles of a design-to-cost approach?
DTC only works when it's built into how a team operates, not bolted on as a review gate before a launch. A handful of principles separate teams that hit their cost targets from teams that discover the number too late to do anything about it.
- Set measurable cost targets before design starts. Derive the allowable cost from market pricing and required margin, then break it down to subsystem and component level so each engineer knows their number.
- Treat cost as co-equal with scope and schedule. A feature that blows the cost target gets renegotiated the same way a slipping deadline does, not treated as untouchable.
- Build cross-functional teams with clear cost ownership. Design, manufacturing engineering, procurement, and finance need a seat at the table from concept, not just at the design freeze.
- Make DFM/DFA and value engineering routine, not exceptional. Part-count reduction and manufacturability reviews should happen at every design gate, not just when costs run over.
- Prototype and should-cost frequently. Cheap, fast feedback loops catch cost drift months before a supplier quote does.
None of these principles work in isolation. A cost target without cross-functional ownership just becomes a number nobody feels responsible for. Governance and clear authority, as the academic literature on design-for-cost points out, matter as much as any specific technique. Give an engineer a £12 target for an enclosure and no authority to push back on a supplier's material recommendation, and the target is decorative.
How do you implement design-to-cost across the product lifecycle?
Design to cost works as a phased discipline, not a single workshop. Each phase has a distinct job, and skipping one usually shows up as a cost surprise two phases later.
- Phase 0, brief and allowable cost. Calculate the allowable cost from market price and target margin, then allocate it across major subsystems so every team has a number to design against.
- Phase 1, concept costing. Use parametric cost models to compare concepts before any detailed design work starts, ruling out architectures that can't hit the target regardless of execution.
- Phase 2, detailed design. Attack part count, material selection, and tolerance stack-up through DFM/DFA reviews. This is where the majority of achievable savings usually get locked in.
- Phase 3, prototyping and should-cost validation. Build early units, tear them down against the cost model, and validate supplier quotes with an independent should-cost estimate rather than accepting the first number back.
- Phase 4, pre-production decisions. Finalise tooling investment, choose processes (injection moulding versus machining, for example), and negotiate volume pricing based on validated should-cost data.
- Phase 5, production and continuous improvement. Track actual unit cost against target monthly, and feed variances back into the next product's Phase 0 brief.
Pro Tip: Run the should-cost validation in Phase 3 even when a supplier quote looks reasonable. Teams that skip this step because "the number seems fine" are the ones most often surprised at volume production, when material and labour assumptions that held at prototype quantities stop holding.
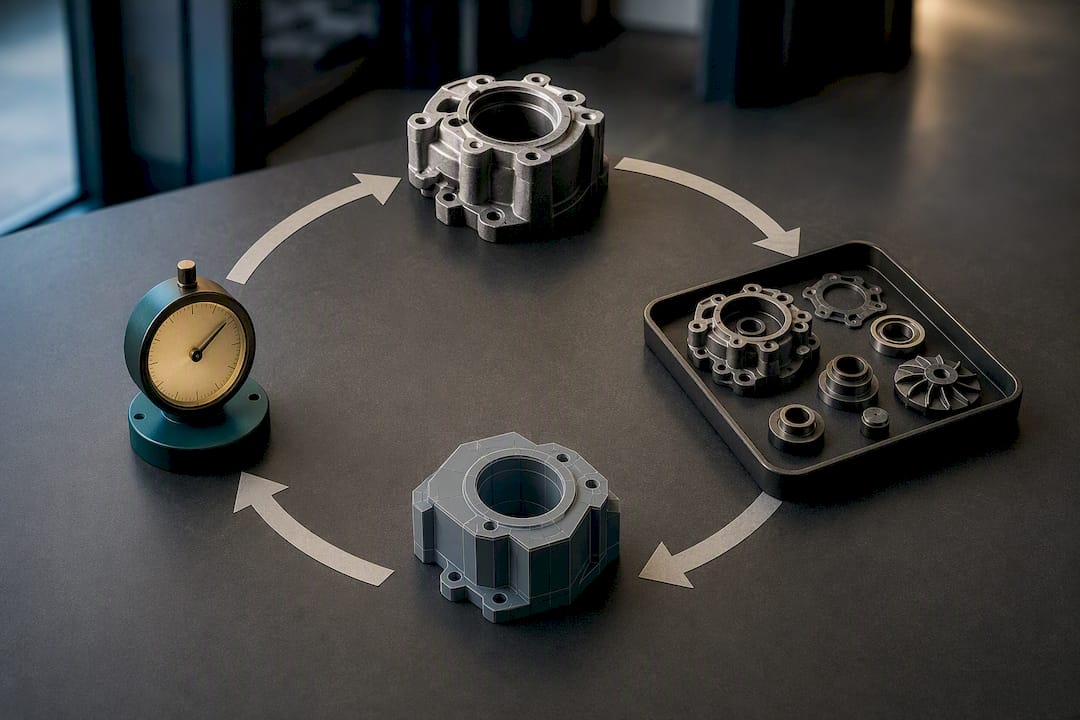
The phases overlap in practice, particularly Phase 2 and Phase 3, where a design change discovered during teardown sends engineers back to CAD. That loop is normal. The failure mode isn't looping back, it's not having a should-cost baseline to loop back against.
What tools and data support accurate early cost estimates?
Early costing lives or dies on data quality, and the right tool depends on how much volume and complexity you're dealing with. A one-off prototype doesn't need the same rigour as a component going into 200,000 units a year.
- Parametric cost models estimate cost from geometry, material, and process before a detailed design exists, and regional cost libraries let teams account for labour and material differences across manufacturing locations.
- CAD-integrated manufacturability checks flag cost and producibility issues as engineers model, rather than waiting for a separate DFM review weeks later.
- Teardown and should-cost studies earn their cost on high-value or high-volume components, where even a small percentage saving compounds across thousands of units. They're overkill for low-cost, low-volume parts.
- Lightweight spreadsheet workflows work fine for early-stage startups or single-product teams, but they scale poorly once you're managing dozens of SKUs or need consistent should-cost benchmarking across suppliers.
The general rule: match the tool's overhead to the decision's stakes. A parametric estimate in an afternoon is enough to rule out a bad architecture. A full teardown is worth the time only when the part's cost or volume justifies the engineering hours it consumes.
What does design-to-cost look like inside an NPD centre?
At an NPD innovation centre, cost targets can be set from market pricing and margin requirements, broken down to component level before detailed design starts. Rapid prototyping cycles then test whether those targets hold up against real geometry and real materials, not just a spreadsheet estimate.
Teardown analysis and strategic sourcing do the heavy lifting once a design is stable enough to quote. Comparing a current part against alternative processes or suppliers often surfaces savings that a should-cost model alone would miss, because supplier pricing structures rarely match theoretical cost breakdowns exactly. AI-driven cost estimation tools can speed up that comparison, giving engineers a should-cost baseline early enough to negotiate from strength rather than accept the first quote.
The teams that hit their cost targets aren't the ones with the best spreadsheet. They're the ones who caught the expensive design decision in Phase 2, before it became a tooling commitment in Phase 4.
The expected outcomes of running DTC this way are fewer late-stage engineering change orders, lower unit cost at launch rather than after several production revisions, and a faster ramp to volume because the design was already validated against manufacturing reality before tooling began.
What are the common pitfalls of design-to-cost, and how do you avoid them?
The most common failure is optimising cost so aggressively that quality or reliability erodes, usually because a cheaper material or supplier passed a should-cost check but not a durability one. Guard against this by pairing every cost decision with a quality gate, not just a price comparison.
Stale or generic cost data is another frequent trap. A parametric model built on two-year-old material prices will mislead a team just as badly as no model at all, so refresh cost libraries regularly and validate them against actual supplier quotes.
Organisational resistance kills more DTC programmes than bad data does. Engineers who've never had cost authority tend to treat targets as someone else's problem. Governance structures that give engineers real authority over cost decisions, backed by supplier KPIs and staged prototyping checkpoints, fix this faster than any spreadsheet upgrade.
What's a realistic 30/90/180-day plan to start using design-to-cost?
You don't need a full platform rollout to start. A staged plan gets a team practising DTC within a month and validating it within two quarters.
- First 30 days: set a measurable target cost, form the cross-functional brief team, and audit the current bill of materials for obvious part-count or material outliers.
- First 90 days: run a prototyping loop against the cost model, and perform teardown or should-cost analysis on the two or three most expensive components in the BOM.
- First 180 days: pilot supplier agreements based on validated should-cost data, lock in the DFM changes that tested well, and measure actual cost against the original target to close the loop.
Each stage produces something concrete: a number, a prototype, or a signed agreement, so progress is visible even before the full product ships.
The leadership shift design-to-cost actually requires
The tooling side of design to cost is the easy part. The hard part is giving engineers real authority to make cost trade-offs without escalating every decision, and most organisations underestimate how much that authority shift threatens existing sign-off habits. Training helps, but incentives matter more: engineers who get measured on cost-to-target the same way they're measured on schedule will actually act on it. Track adoption with something simple, like the percentage of design reviews that include a cost check, and the culture follows the metric faster than any workshop achieves it alone.
— Nya
How Emuski helps teams put design-to-cost into practice
Emuski runs cost engineering as a standalone discipline, not an afterthought bolted onto manufacturing. If your team is trying to hit a target cost without the trial-and-error most product development goes through, Emuski's cost engineering services cover should-cost analysis, DFM optimisation, and VAVE methodology, the same phased approach described above, applied to your actual bill of materials rather than a generic template.
Most engagements start with a brief and a should-cost baseline on your highest-cost components, then move into a pilot, often alongside rapid prototyping to validate whether a design change actually delivers the projected saving before committing to tooling. For teams that need supplier renegotiation or teardown-driven sourcing decisions, strategic sourcing support adds the supplier-side leverage that a cost model alone can't provide. Deliverables are concrete: a validated cost target, a should-cost report against your current supplier quotes, and a prototyping outcome you can measure against the original brief. Get in touch with Emuski's cost engineering team to scope a should-cost baseline on your next design.
Sources
For readers who want the underlying research, aPriori's overview of design to cost covers parametric costing and CAD-integrated feedback in more depth. The academic review of design-for-cost methods is the strongest source on lifecycle cost distribution and governance. 42 Technology's framework and Marketopia both offer practical tactics worth reading in full.
- What Is Design to Cost? An Overview With Examples | aPriori
- Design for Cost—A Review of Methods, Tools and Research Directions
FAQ
What is the cost of design in a product development budget?
Design costs vary enormously by industry and complexity, ranging from a few thousand pounds for a simple consumer product to well into six figures for a regulated medical device or automotive component. Emuski's product cost estimation service is priced per project within the published range.
What does "cost to cost" mean?
"Cost to cost" usually refers to the cost-to-cost method used in project accounting, where the percentage of a project's total budget spent so far is used to estimate the percentage of work completed. It's a progress-tracking method, distinct from design to cost, which is a product engineering discipline focused on hitting a target unit cost.
What is the cost-to-cost method?
The cost-to-cost method calculates project completion percentage by dividing costs incurred to date by total estimated project cost, commonly used in long-term contracts and construction accounting for revenue recognition. It answers "how far through the budget are we", not "does the product meet its cost target", which is the question design to cost is built to answer.
How is design to cost different from value engineering?
Design to cost sets a target cost early and shapes design decisions to meet it, while value engineering typically happens as a review exercise that strips out features or specifications customers don't actually value. The two work well together: value engineering can free up cost headroom that a DTC programme then allocates elsewhere in the design.
When should a team start applying design-to-cost principles?
Design to cost delivers the most value when applied from the concept phase, before material and process decisions are locked in, since most lifecycle cost gets fixed during early design. Starting after detailed design is finished still helps, but the achievable savings shrink considerably once tooling commitments are already made.